The other day, while finishing a tank top I made for myself, it came to me that not everyone, and especially new crocheters, know how to sew a garment together. So ,while I was at it, I decided to take some pictures and show you how it's done....
Before starting, you should know that you'll be sewing as if you were crocheting in a" back loop only" and "front loop only "style. If you're new to crochet, that means you will only pick up half the stitch with your yarn needle (usually you'd do this with your hook). Hopefully, this will be clear following my photos. Why sew, instead of crochet? Because, even if you use the flat braid method, you'll still get a ridge. If you follow these steps, you should not be able to see the seam.
If you are planning on blocking, it's better to block the individual sides before sewing them together. You should use a grid or measuring tape when doing this, because you don't want one side to be blocked bigger than the other! I didn't block my top, because it's cotton and I know I won't have the patience to re-block every time I wash it, since I plan on wearing it often. I always leave long tails when crocheting and sewing (if I haven't made a knot). This is useful for putting the right or wrong sides together as well as for making knots. I should tell you, that I usually weave in the ends and do not knot when I crochet, but when making a garment, espescially one that will be thrown in the washing machine, it is
absolutely necessary to make knots. You wouldn't want hours of work to come apart at the seems would you? So, when I'm finished, I either make a surgeon's knot, or a triple knot and
pull as tight as possible, then cut
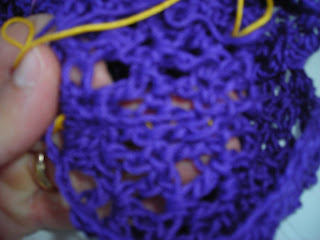
as close as possible to the knot. If you've made the knot correctly, this will not pull your work. If you have a little bit of yarn sticking out, you can put a little clear nailpolish on it to prevent from fraying, but you should cut as close as possible, like I said. I have used yellow yarn for better visibility but, obviously, you'll use the same yarn you used for your garment.
One last note: If you're sewing a seam for a very lightweight garment, you can choose to do only the "back loop only" part and skip the front. When you do both sides, the seam is heavier, but has a stronger hold, because you've worked it twice. If you have a lace weight garment, doing only the back side is better because the seam will stay light and is absolutesly invisible. I do recommend doing both sides in the shoulder seams, because there is more stress in that area when the garment is worn, but you may not even need it there if it's a delicate one. I have worked both sides on my top.
The photo tutorial shows how to do the side seams, but after lining up your work,
you should start at the shoulders, using the same technique.
Here we go.......
First, you'll need to place one side right side up and the other, on top, right side
down. Aline the sides so that they match perfectly, and place stitch markers along both sides ( I use paper clips. A trick I learned from
futuregirl )
As you can see, I didn't put the markers through the actual stitches, but through the spaces instead. This makes it easy to remove them, but is only possible if you have done an openwork garment. Otherwise, put them through the stitches.
Now measure your yarn and cut. Two and a half lengths of your seam is usually enough ( one and a half if you're only working one side). Thread you needle, do not make any knots.
Start at the bottom, leaving a long tail of yarn and make a circle, which is an imitation of a crochet stitch.
The above photo is solely to demonstrate how you will be sewing ; through the back loop of the stitch.
Now, with your hand underneath, hold both sides, so that your stitches are almost touching, and run your needle through the
back loop only (i.e. the one on the wrong side, which is also closest to you)and pull through.As you complete each stitch, pull so that it's snug, but not too tight, or you will ruin the invisible seam.
You will be sewing in a serpentine or S fashion. Notice that I have not pulled my stitches. This is only so that you can clearly see them, but yours will be closed as you work.Continue sewing like this all the way up the sides.
In the photo above, I've turned my work to show you how the seam is invisible on the other side. If you have chosen to do only one side,when you get to the top, go back down a stitch or two and tightly knot your thread to a stitch. Cut and go back down to where you started. Thread your needle with the tail, work up a stitch and knot as before,cut and go on to the other seam. If you want to do the other side, proceed as follows:
Turn your work over to the right side, run the thread through as shown below, picking up the
front loop only (which is still the closest one to you)
Now, sew through as before, working through every
front loop only, until you get back to the bottom, turn your work again and bring the neddle to the back and up a stitch. Now bring the tail up a stitch and make a secure knot using the two ends. (This is not shown) Pull
as tight as possible and cut
as close as possible.
Now you're ready to sew the other side seam.
Above I've shown the finished seam and left my thread aligned, so that you can see where I've ended.
Here it is on me, the seem is almost aligned with the one on the white one underneath.
Invisible! Once you finished your seams, you're ready to do the edging and then your project will be complete!
I hope this tutorial has helped you. As always if you have any questions, need help, or have found an error, let me know. I'll be glad to help! :)


